Sublimation printing is a process that allows you to transfer an image onto a substrate using heat and pressure. It’s a popular printing method for creating customized products such as t-shirts, mugs, and phone cases. If you’re new to sublimation printing, this guide will give you an overview of the process and what you need to get started.
What is Sublimation Printing?
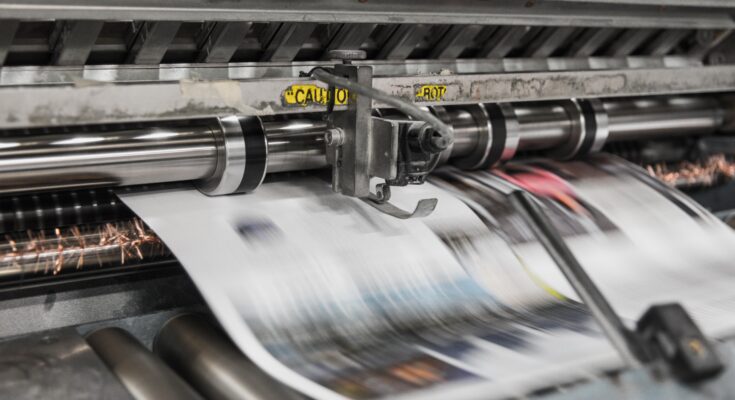
Sublimation printing is a digital printing technique that uses heat and pressure to transfer dye onto materials such as polyester or other synthetic fabrics, ceramics, and plastics. The process involves printing the image onto transfer paper using special dye-sublimation ink and then using a heat press to transfer the image onto the substrate. When heated, the ink turns into a gas and permeates the surface of the material, resulting in a permanent, high-quality image.
Benefits of Sublimation Printing
There are several benefits to using sublimation printing for your custom products:
- Durable – Sublimation printing creates a permanent image that won’t fade, peel, or crack.
- Vibrant colors – Sublimation printing produces vivid, high-quality images with excellent color accuracy.
- Versatile – Sublimation printing can be used on a variety of substrates, including polyester fabrics, ceramics, and plastics.
- Cost-effective – Sublimation printing allows you to print small quantities of custom products at a low cost.
- Eco-friendly – Sublimation printing is a more environmentally friendly printing option compared to other printing methods that use solvent-based inks.
Getting Started with Sublimation Printing
To get started with sublimation printing, you’ll need the following:
- Sublimation printer – Sublimation printers are designed to print with dye-sublimation ink. There are several options available, including desktop printers and wide-format printers.
- Dye-sublimation ink – Dye-sublimation ink is specifically designed for sublimation printing and is available in cartridges or bottles.
- Transfer paper – Transfer paper is used to transfer the image from the printer to the substrate. There are different types of transfer paper available depending on the substrate you’re using.
- Heat press – A heat press is used to transfer the image onto the substrate. There are several types of heat presses available, including clamshell, swing-away, and mug presses.
- Substrates – Substrates are the materials that the image will be transferred onto. Some popular substrates for sublimation printing include polyester fabrics, ceramics, and plastics.
The Sublimation Printing Process
Once you have all the necessary equipment and materials, you can begin the sublimation printing process:
- Create your design – Use a graphic design software program to create your design. Be sure to size it correctly for the substrate you’ll be using.
- Print your design – Print your design onto transfer paper using your sublimation printer and dye-sublimation ink.
- Prepare your substrate – Pre-press your substrate to remove any moisture and wrinkles.
- Transfer your design – Place the transfer paper face-down onto the substrate and use a heat press to apply heat and pressure. The heat and pressure will cause the ink to turn into a gas and permeate the surface of the substrate, resulting in a permanent image.
- Finish your product – Remove the transfer paper and allow the substrate to cool. Your custom product is now complete!
Tips for Sublimation Printing Success
- Use High-Quality Images: The quality of the image you use will affect the final product. Use high-resolution images with a DPI of at least 300 to ensure a crisp and clear image transfer.
- Choose the Right Substrate: Make sure your substrate is compatible with sublimation printing. Substrates should have a polymer coating or be made of polyester or other synthetic materials.
- Test Your Settings: Before printing on your final product, test your settings on a sample piece of substrate. This will help you determine the correct temperature and time for your heat press.
- Use a Heat-Resistant Tape: Use heat-resistant tape to hold your transfer paper in place on your substrate. This will prevent it from shifting during the transfer process.
- Follow the Manufacturer’s Instructions: Always follow the manufacturer’s instructions for your sublimation printer, ink, transfer paper, and heat press. Each brand may have slightly different instructions, so make sure to read and follow them carefully.
- Clean Your Heat Press Regularly: Regularly clean your heat press to remove any residue or buildup. This will help ensure consistent heat and pressure during the transfer process.
- Keep Your Workspace Clean: Keep your workspace clean and free from dust and debris. This will help prevent any unwanted particles from getting trapped between the transfer paper and the substrate.
- Don’t Overheat Your Substrate: Overheating your substrate can cause the image to blur or bleed. Be sure to follow the recommended temperature and time settings for your specific substrate.
- Use Protective Gear: When handling hot transfer paper and substrates, use protective gear such as heat-resistant gloves to prevent burns.
- Have Patience: Sublimation printing can take some time and practice to perfect. Don’t get discouraged if your first few attempts don’t turn out as expected. With patience and practice, you’ll be able to create high-quality custom products with sublimation printing.